Hello there, The first thing I do when setting up any device is “Enabling Dark Mode”. It’s not just a cool aesthetic switch; it also has a few benefits I’m sure you’ll appreciate. While setting up my new Macbook, i thought to figure out how to do these things quickly, rather than regular long path of navigating through screens.
In this blog post, I’m sharing two simple methods to enable Dark Mode on your Mac. Keeping it casual and straightforward. So, buckle up and let’s get started!
Option 1: The Command Line Way
For those of you who aren’t afraid to dabble in the Terminal and enjoy the efficiency of a quick command, this one’s for you.
- Start by opening the Terminal application. Just hit Command + Space, type ‘Terminal’ in the Spotlight search, and press enter.
- Next, copy and paste the following command into your Terminal window, and then hit ‘Enter’:
osascript -e 'tell application "System Events" to tell appearance preferences to set dark mode to true'That’s it. You’re done.
Just incase if you want to revert back to light mode, run following command.
osascript -e 'tell application "System Events" to tell appearance preferences to set dark mode to false'That was easy, isn’t it? and much quicker than navigating through many screens.
Option 2: The UI Way – Via System Settings / System Preferences Route
If you’d rather not delve into the world of Terminal commands, no worries – you can easily enable Dark Mode through System Preferences. Here’s how:
- Click on the Apple logo in the top left corner of your screen. A drop-down menu will appear; from there, click on “System Settings.” (or System Preferences if you’re on old Mac version)s
- Once you’re in System Setting, look for the “Appearance” settings. Click on Appearance
- You’ll have three options: “Light,” “Dark,” and “Auto.” If you want to dive right into Dark Mode, click “Dark.” If you’d rather your Mac switch between Light and Dark Modes depending on the time of day, choose “Auto.
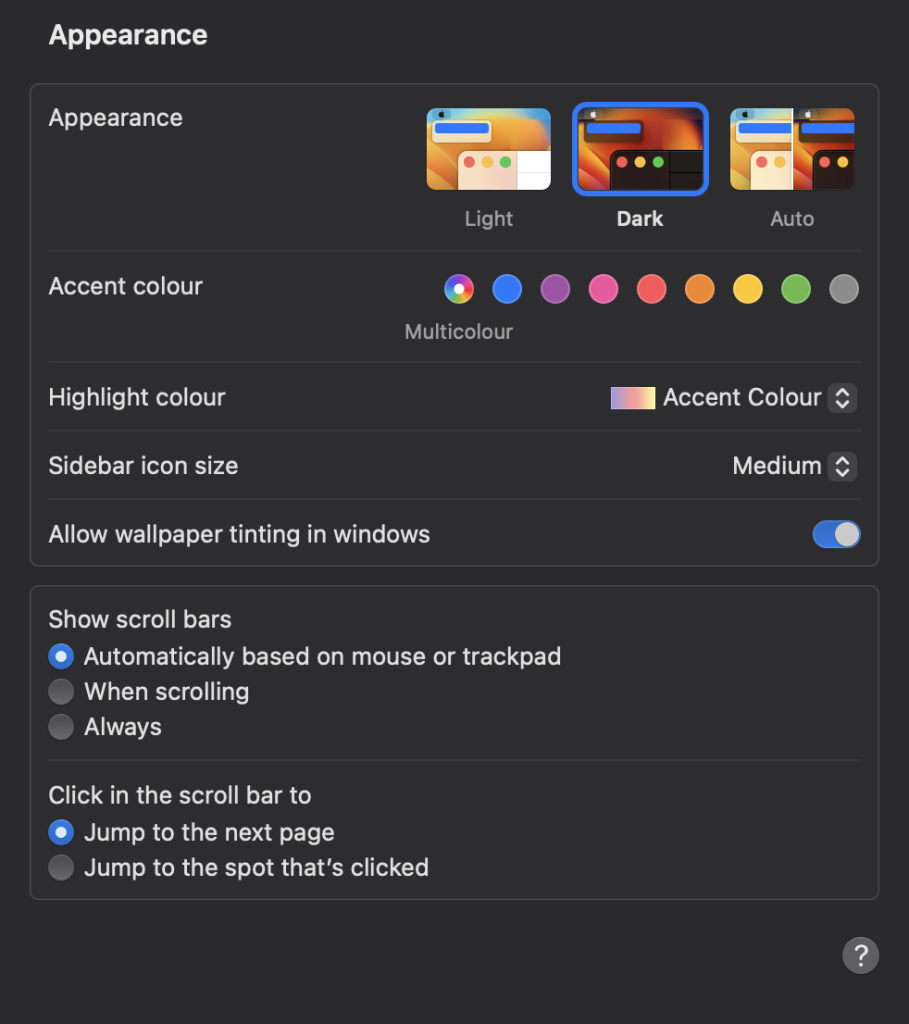
And voilà! Your Mac is now sporting the sleek, eye-friendly Dark Mode.
Incase of old MacOS versions, you might need to look for these settings in System Preferences > General > Apperance.
Why Dark Mode?
Whether you’re a night owl who burns the midnight oil or simply someone who appreciates a change of scenery, Dark Mode can be a real game-changer. Here’s why I love it:
- Easy on the eyes: The darker color palette reduces eye strain, especially in low-light conditions.
- Improved focus: With less screen glare and a more subdued appearance, it’s easier to concentrate on your work.
- Battery friendly: If you’re using an OLED display, Dark Mode can help save battery life.
- Better sleep: Less exposure to blue light in the evenings can actually help improve your sleep.
So, there you have it! Two easy methods to switch your Mac to Dark Mode. Whether you’re a code enthusiast or prefer clicking through settings, now you can enjoy the benefits of Dark Mode with ease.
Happy browsing, folks!
Official Apple documentation here, just incase if you’re interested.
If you use Microsoft Teams, you may want to check out my article on running multiple accounts on Teams simultaneously.